Leave Your Message
0%

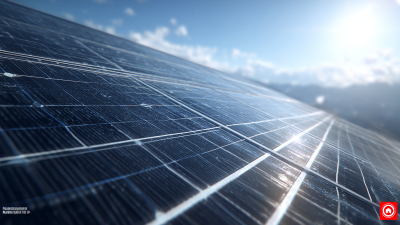
Picking the right Solar Panel? Honestly, it’s rarely just a numbers game—wattage and advertised efficiency only tell you so much. A panel that looks amazing in a lab can underperform on a shaded roof in Manchester, a dusty property in Phoenix, or a humid coastal home in Singapore. Roof direction, space, local weather, electricity rates, how well it’s installed, and what you’ll need down the road all come into play. And just because a 430-watt panel is bigger on paper than a 400-watt one doesn’t automatically make it the better choice. Sometimes it just means you need to plan a little more carefully.

Vikram Aggarwal, founder and CEO of EnergySage, put it well: “The best solar system is the one that fits your home, your budget, and your goals.” That’s still solid advice. Buyers should look at efficiency, temperature coefficient, product warranty, performance warranty, degradation rate, fire certifications, and the manufacturer’s service history. Companies like REC Group, Maxeon, and Qcells often get checked against those factors, but a strong brand name isn’t a substitute for doing your own homework. Installer experience matters a lot. So does the roof under the equipment.

There’s no perfect panel.

This guide compares the features that actually shape long-term value. It also pushes back on some common assumptions—like the idea that the highest efficiency always gives you the best return. A smart choice weighs energy production, maintenance access, inverter compatibility, financing terms, and how long your roof is likely to last. Some recommendations may stay uncertain because product data, climate, and household usage vary so much. That uncertainty is worth paying attention to, not papering over with easy promises.
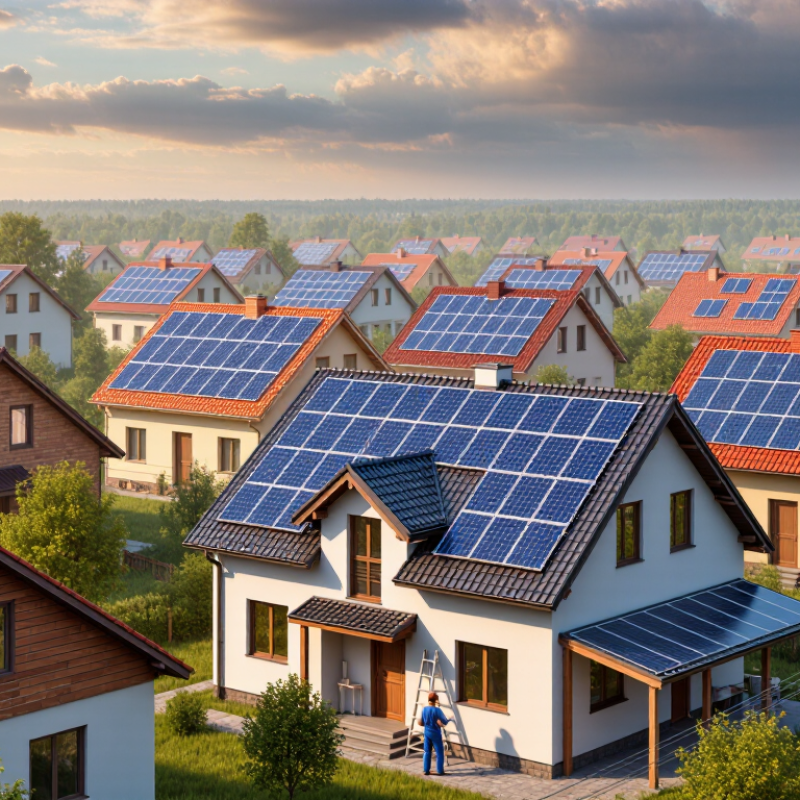
How to Choose the Best Solar Panel for Your Needs?

Define Your Energy Needs Using Annual kWh Consumption and Peak Demand

Choosing the best Solar Panel starts with numbers, not panel appearance. Pull twelve months of electricity bills before comparing efficiency or warranties. The U.S. Energy Information Administration reported average residential consumption of 10,791 kWh in 2022. Use your own figure instead of that national average. Real life is messier.

Annual kWh shows how much energy your array should produce. Peak demand shows how much power your home needs at one moment. NREL’s PVWatts model applies a default system-loss assumption of about 14%, covering wiring, inverter, and other losses. If your home uses 10,800 kWh yearly, and local solar data indicates 1,400 kWh per installed kW, a rough design needs 7.7 kW before additional shading adjustments. NREL’s National Solar Radiation Database can refine that estimate by location. The calculation is useful, but imperfect.

Check interval data when available, especially if air-conditioning, pumps, or electric cooking run together. A house may use modest annual energy yet reach a 6 kW evening peak. That peak can influence inverter and Battery sizing more than annual consumption. AVertical Solar Panel arrangement may capture different morning or winter light, but its output depends heavily on façade direction, shading, and local weather. Do not choose it from annual kWh alone. I would revisit the estimate after one seasonal review, because household habits often change. Pair measured demand with roof geometry, not assumptions.

Assess Roof Space, Orientation, Tilt, and 1,000 W/m² STC Conditions

Choosing the best solar panel starts with your roof, not a product catalogue. Measure usable roof space after vents, skylights, access paths, and required edge clearance. A tape measure and a simple roof sketch can reveal capacity more honestly than a sales estimate. Measure twice.

Orientation matters, but shading can matter more. In the Northern Hemisphere, south-facing surfaces usually receive strong annual sunlight; north-facing surfaces often perform better in the Southern Hemisphere. Local roof angle and nearby trees still deserve an hourly shade check.

Tilt influences how directly sunlight reaches the modules across the year. A tilt near local latitude is a useful starting point, though snow, wind, and roof design may justify another angle.

Panel power is tested under Standard Test Conditions: 1,000 W/m² irradiance, 25°C cell temperature, and an AM1.5 spectrum. This is a laboratory reference. Ratings are not promises. Real roofs run hotter, and output falls with heat, dirt, clouds, wiring losses, and partial shade. Compare estimates based on local weather data, roof orientation, tilt, and temperature coefficients rather than wattage alone. An experienced installer should inspect the structure, mounting points, cable routes, and drainage before recommending a layout. Ask to see the assumptions behind the annual energy estimate. If the calculation uses perfect midday sunlight, question it. Field assessments often show small shaded areas reducing an otherwise impressive array’s performance. That lesson is easy to miss. Leave room for maintenance, too.

Compare Monocrystalline, Polycrystalline, and Thin-Film Efficiency Ranges

Choosing a solar panel starts with efficiency, not appearance.

Efficiency shows how much sunlight becomes electricity under standard test conditions. The 2024 Fraunhofer ISE Photovoltaics Report places commercial monocrystalline modules roughly around 20–23%. Polycrystalline modules commonly reach about 17–20%. Thin-film modules often range from 10–19%, depending on the technology.

Monocrystalline panels suit limited roof space. Their darker cells can produce more power from each square metre. Polycrystalline panels usually cost less, but need additional area for the same output.

Thin-film panels are lighter and perform reasonably in some low-light or high-temperature conditions. Their lower efficiency may matter on a small urban roof. Check the numbers carefully.

NREL’s 2024 Best Research-Cell Efficiencies chart shows laboratory results far above typical commercial modules. That difference matters. A test cell is not your dusty rooftop in midsummer. During a Solar Panel Installation assessment, I would measure shade, roof direction, usable area, and local temperature. A south-facing roof is helpful, but not always ideal. Wiring losses and inverter limits also reduce real production. One imperfect assumption can distort payback estimates.

Estimate Real-World Output with Temperature Coefficients and Local Sun Hours

How to Choose the Best Solar Panel for Your Needs?

Estimate Real-World Output with Temperature Coefficients and Local Sun Hours

A panel’s laboratory rating is only a starting point. Your Solar Panel System will face heat, dust, wiring losses, and changing sunlight. Local peak sun hours offer a more useful estimate than annual sunshine totals. A site receiving 4.5 peak sun hours may support about 1.8 kilowatt-hours daily from a 400-watt panel before losses.

Heat changes everything. Most panels lose output as cell temperature rises above 25°C. Check the temperature coefficient, often listed as a negative percentage per degree Celsius. For example, a coefficient of -0.35% means a 45°C cell temperature can reduce output by about 7%. Roof surfaces can become much hotter than the surrounding air. Ventilation and mounting clearance therefore matter.

I once made an optimistic estimate using air temperature alone. It ignored the dark roof beneath the panel. That mistake changed the expected result noticeably. A practical calculation might reduce the 1.8 kilowatt-hours by seven percent for heat, then subtract another 10–15% for inverter, cable, dust, and shading losses. The result may be closer to 1.42–1.52 kilowatt-hours. Use local solar data, roof measurements, and seasonal shade checks. A professional installer should verify these assumptions, but even their first estimate deserves questions. Forecasts are useful, not perfect.

Evaluate Degradation Rates, 25-Year Warranties, and Long-Term Performance

How to Choose the Best Solar Panel for Your Needs?

A reliable Home Solar Panel System depends on long-term output, not only today’s efficiency rating. NREL’s field research found median crystalline-silicon degradation near 0.5% annually. At that rate, a panel may retain about 88% of its original output after 25 years. That sounds reassuring, but real results vary with heat, humidity, installation quality, and cleaning habits. Fraunhofer ISE’s Photovoltaics Report also highlights performance differences caused by climate and system design.

Study the warranty language carefully. A 25-year performance warranty should show yearly limits, not only a final percentage. Check the first-year loss, annual degradation rate, and guaranteed output in year 25. Also inspect exclusions for labor, shipping, roof access, and claim deadlines. A strong warranty is useful only when the installer remains traceable and financially stable. I have seen buyers focus on the warranty length, then overlook weaker service terms. That is an expensive detail.

Tips: Compare the promised year-25 output with NREL’s 0.5% benchmark. Ask for independent test results, temperature coefficients, and documented field data. Measure shade across the roof during winter and summer. Remember, a slightly cheaper panel can cost more if it degrades faster. Keep records of installation photos and annual production. Perfect predictions are impossible. Performance estimates still involve uncertainty.

How to Choose the Best Solar Panel for Your Needs?

Evaluate degradation rates, 25-year warranties, and long-term performance

This chart shows the estimated percentage of original panel output remaining after 25 years under common annual degradation scenarios. A 0.5% annual degradation rate is widely used as a practical industry benchmark, while lower rates indicate stronger long-term performance. When comparing panels, review both the guaranteed degradation rate and the warranty period, since a 25-year warranty is most valuable when it includes a clear end-of-term power guarantee.

Estimated 25-year retention is calculated using compound degradation: (1 − annual degradation rate)25. Values are technology-neutral industry benchmark scenarios and are not associated with any manufacturer or brand.

Compare System Costs, Inverter Compatibility, Safety Standards, and Incentives

Choosing the best solar panel starts with the whole system, not the panel alone. Compare panel output, roof space, installation labor, wiring, storage, and maintenance. A cheaper panel may require more units, increasing racking and labor costs. Ask for an itemized quote with projected annual production.

Inverter compatibility deserves careful attention. Panel voltage, current, and power must match the inverter’s operating range. Your installer should check shading, roof direction, temperature changes, and future battery plans. Request written calculations, not vague promises. I have found that small voltage details can affect performance more than attractive efficiency figures.

Tips: Check certification marks for electrical safety, fire resistance, and mechanical strength. Confirm that the installer follows local inspection requirements. Review warranties, but read their exclusions carefully. Incentives may reduce costs, yet eligibility, deadlines, and tax treatment vary by location. Verify current rules with an official authority before signing. Do not assume every rebate applies to batteries or labor. A professional assessment should also explain backup behavior during outages, because many systems shut down without approved safety equipment. Some advice online sounds confident but is incomplete. Your roof, climate, electricity use, and budget still matter most.

How to Choose the Best Solar Panel for Your Needs? - Compare System Costs, Inverter Compatibility, Safety Standards, and Incentives

Solar System Option Best For Typical Panel and System Specifications Estimated Installed Cost Inverter Compatibility Key Safety Standards and Requirements Potential Incentives and Financial Considerations
Standard Monocrystalline System Homeowners seeking a balanced combination of price, efficiency, and long-term performance. Typical panel output: 350–450 W
Typical efficiency: 19%–22%
Typical system size: 5–8 kW
Expected useful life: approximately 25–30 years
Approximately $2.50–$4.50 per watt installed in the United States.

A 6 kW system may cost about $15,000–$27,000 before incentives.
Compatible with string, string-with-optimizers, and microinverter designs.

Confirm the inverter’s maximum input voltage, operating voltage range, maximum current, and total DC capacity.
Look for panels tested to IEC 61215 and IEC 61730 or equivalent national standards.

The complete installation should comply with applicable electrical codes, grounding rules, disconnect requirements, and local permitting procedures.
Eligible projects may qualify for federal, state, local, or utility incentives, depending on location and installation date.

Compare the net cost after rebates, tax credits, financing charges, and utility export rules.
High-Efficiency Monocrystalline System Homes with limited roof area, shading constraints, or a need for maximum energy production per square meter. Typical panel output: 400–500 W
Typical efficiency: 21%–24%
Usually requires fewer panels for the same system capacity.
Lower area-related balance-of-system costs may offset a higher panel price.
Often costs approximately 5%–20% more for panels than standard-efficiency options.

Total installed cost still depends mainly on labor, roof complexity, electrical upgrades, and permitting.
Compatible with most modern string and microinverter systems when electrical limits are satisfied.

Higher-power modules may require an inverter with sufficient maximum DC input current.
Verify fire classification, mechanical-load ratings, wind and snow-load suitability, and certification for the intended mounting method.

Maintain required roof setbacks and access pathways under local fire codes.
Incentives generally apply to the eligible system cost rather than panel efficiency alone.

Higher efficiency can improve lifetime energy yield, but the payback should be compared with the added upfront cost.
Shaded-Roof System with Module-Level Electronics Roofs with multiple orientations, partial shade, dormers, chimneys, or irregular panel layouts. Panel specifications may be similar to standard systems.
Module-level power electronics can reduce the effect of mismatch between panels.
Energy gains depend on the amount, timing, and location of shade.
Commonly costs more than a basic string-inverter system because of additional electronics and installation labor.

The added cost may be justified when shade or complex roof geometry would significantly reduce string-level production.
Use approved microinverters or DC power optimizers that match the panel’s voltage and current ratings.

Check communication requirements, equipment spacing, replacement procedures, and monitoring compatibility.
In the United States, residential systems commonly require rapid shutdown equipment under NEC 690.12, subject to applicable code editions and local enforcement.

Equipment should be listed for the intended application and installed according to its certification.
Incentive eligibility is usually based on the qualifying solar installation rather than the presence of module-level electronics.

Ask whether additional equipment qualifies under the same program rules.
String-Inverter System Unshaded roofs with one or two consistent orientations and homeowners prioritizing lower initial cost. Multiple panels are connected into one or more DC strings.
Simple architecture can reduce equipment count.
Performance is more sensitive to shading and panel mismatch within each string.
Often one of the lower-cost inverter configurations for an unshaded roof.

Replacement of a central inverter may be required during the system’s lifetime, depending on equipment life and service conditions.
Confirm string voltage at the site’s lowest and highest expected temperatures.

The total open-circuit voltage must remain below the inverter limit, while operating voltage must stay within the inverter’s MPPT range.
The inverter should be certified to applicable grid-interconnection and anti-islanding requirements, such as UL 1741 in the United States.

Include DC and AC disconnects, overcurrent protection, grounding, and required rapid shutdown equipment.
May qualify for the same solar incentives as other compliant system designs.

Lower equipment cost does not necessarily mean lower lifetime cost; include maintenance, monitoring, and replacement planning.
Microinverter System Systems with significant shading, multiple roof planes, or a preference for panel-level monitoring and redundancy. One inverter is installed at or near each panel.
Panel output is converted from DC to AC at the module level.
A single inverter failure generally affects only the associated panel rather than the entire array.
Typically has a higher initial equipment and labor cost than a basic string-inverter system.

Lifetime economics depend on shade reduction, monitoring value, warranty terms, and service accessibility.
Panels must be matched to the microinverter’s maximum DC voltage, maximum input current, and recommended power range.

The AC trunk system must also meet conductor ampacity and circuit aggregation limits.
Module-level electronics can simplify compliance with rapid shutdown requirements when the listed system is installed correctly.

Follow manufacturer spacing, connector, grounding, and rooftop temperature requirements.
Incentives may cover eligible microinverter equipment as part of the qualifying solar installation.

Verify whether monitoring hardware, communications equipment, and labor are included in the program’s eligible cost.
Hybrid Solar-plus-Storage System Homeowners seeking backup power, greater self-consumption, or reduced dependence on evening grid electricity. Combines solar panels with a battery and a hybrid inverter or integrated power-conversion system.
Storage capacity is commonly selected according to critical-load demand and desired backup duration.
Batteries require suitable temperature control, ventilation, clearances, and location planning.
Frequently costs substantially more than solar alone because of the battery, transfer equipment, controls, and additional installation work.

Obtain a site-specific quote that separates solar, storage, backup-load wiring, and service upgrades.
The hybrid inverter must match the battery chemistry, nominal voltage, usable capacity, continuous power, surge power, and communication protocol.

Confirm whether the inverter can operate both grid-connected and in backup-island modes.
Battery systems should use equipment listed to applicable energy-storage standards, such as UL 9540 and UL 9540A testing where required by local rules.

Installations must address fire separation, emergency disconnects, ventilation or thermal controls, and utility interconnection requirements.
Storage incentives vary by jurisdiction and may have separate eligibility rules from solar incentives.

Evaluate time-of-use rates, outage value, battery degradation, round-trip efficiency, and expected cycling frequency.
Ground-Mounted Solar System Properties with suitable land, limited roof space, poor roof condition, or a preference for easier access and adjustable orientation. Allows optimized tilt and orientation when site conditions permit.
May simplify cleaning, inspection, and future maintenance.
Requires adequate land, structural foundations, trenching, and protection from vegetation or animals.
May cost more than a simple roof installation because of racking, foundations, trenching, fencing, and site preparation.

Costs vary considerably with soil conditions, distance to the main electrical service, and permitting requirements.
Supports string, optimizer, or microinverter configurations.

Underground conductors, equipment grounding, voltage drop, and outdoor-enclosure ratings must be included in the design.
Racking and foundations must be engineered for local wind, snow, seismic, and corrosion conditions.

Maintain required clearances and protect exposed wiring from physical damage, moisture, and ultraviolet exposure.
Incentives may be similar to roof-mounted solar if the project meets program and interconnection rules.

Add potential costs for land preparation, fencing, drainage, and property-tax treatment.
Commercial or Large Residential System Large homes, farms, multifamily properties, and small commercial facilities with higher daytime electricity use. Typical system size: above approximately 10 kW, although classifications vary by jurisdiction.
May use multiple inverters, larger conductors, revenue-grade metering, and engineered structural designs.
Demand charges and export limits can materially affect system economics.
Cost per watt can be lower than small residential projects because of scale, but engineering, interconnection, and construction complexity may increase total project cost.

A professional feasibility study is recommended.
Inverter selection must account for three-phase or single-phase service, utility protection settings, power-factor requirements, and export-control capabilities.

Large systems may require advanced utility studies and specialized protection equipment.
Require stamped engineering where applicable, structural analysis, arc-fault and ground-fault protection, equipment labeling, and utility-approved interconnection protection.

Follow the locally adopted electrical and fire codes.
Tax treatment, accelerated depreciation, grants, renewable-energy certificates, and utility programs may differ from residential programs.

Review incentives with a qualified tax professional and the relevant program administrator.
Comparison note: The cost ranges above are illustrative United States residential estimates before incentives and can vary substantially by region, roof condition, labor rates, permitting, electrical upgrades, financing, and system size. Always verify current incentive rules, utility requirements, code editions, equipment certifications, and installer credentials before purchasing.
General reference frameworks include IEC 61215, IEC 61730, UL 1741, NEC 690.12, UL 9540, and UL 9540A. These standards and their local enforcement requirements may change over time.

All-in-One Solar Street Lights: A Complete Guide to Efficient Outdoor Illumination from China Suppliers Factory

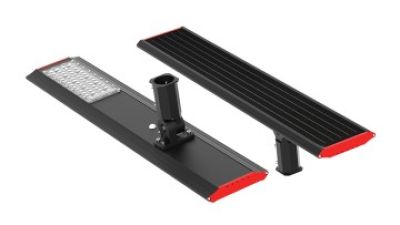
All-in-one solar street lights combine the solar panel, LED lamp, battery, controller, and other essential components in a single compact unit. This integrated design reduces wiring and simplifies transportation, making installation faster and more economical than traditional street lighting systems. During the day, the solar panel converts sunlight into electricity and stores it in the battery, while the LED lamp provides reliable illumination after dark. With no connection to the public power grid, these lights can help reduce electricity consumption and ongoing operating costs.

Suppliers and factory manufacturers in China offer a wide range of all-in-one Solar Street Lights for residential roads, parks, parking areas, village streets, industrial sites, and urban projects. Buyers can select different power levels, lighting modes, battery capacities, mounting designs, and motion-sensing functions according to local sunlight conditions and illumination requirements. Durable housings, efficient LED chips, and weather-resistant construction support stable performance in outdoor environments, including areas exposed to rain, dust, and temperature changes.

Working with an experienced China supplier or factory can provide access to customizable product designs, quality inspections, technical support, and flexible order quantities. Before purchasing, project managers should evaluate solar radiation, installation height, daily lighting hours, battery performance, and maintenance needs. Proper planning helps ensure dependable nighttime visibility while supporting cleaner energy use and easier deployment in both urban and rural applications.

FAQS

How should I check whether my roof can hold enough solar panels?

Measure usable areas after vents, skylights, walkways, and edge clearances. A tape measure helps. Sketch the roof before requesting quotes. Leave space for maintenance and safe access. Measure twice.

Does roof direction determine solar performance?

Direction matters, but nearby shade may matter more. Check trees and buildings throughout the day. Seasonal shadows can change output significantly. A small shaded corner may affect an entire string. Shade is easy to underestimate.

What roof angle usually works well for solar panels?

An angle near your local latitude is a useful starting point. Snow, strong winds, and roof structure may require another angle. Ask for a structural inspection before mounting panels. The ideal angle is not always practical.

What do standard test conditions mean for panel power ratings?

Standard test conditions use 1,000 W/m² sunlight and a 25°C cell temperature. They also use an AM1.5 light spectrum. These laboratory ratings are reference points. Real panels become hotter and encounter clouds, dirt, shade, and wiring losses. Ratings are not promises.

How much output can a panel lose over twenty-five years?

Crystalline-silicon panels often degrade near 0.5% annually under common field conditions. A panel might retain about 88% of its original output after twenty-five years. Heat, humidity, cleaning, and installation quality can change the result. Ask for yearly degradation limits. Perfect predictions do not exist.

What should I inspect in a long-term performance warranty?

Check the first-year loss, annual degradation rate, and guaranteed year-25 output. Read exclusions for labor, shipping, roof access, and claim deadlines. Confirm that the installer remains traceable and financially stable. A long warranty can still provide weak practical support. That detail is easy to miss.

How should I compare the total cost of different solar systems?

Compare panels, mounting hardware, labor, wiring, storage, maintenance, and expected production. A lower-priced panel may require more units and increase installation costs. Request an itemized quote with written energy assumptions. Keep installation photos and annual production records. A spreadsheet can still mislead.

Why must panels match the inverter?

Panel voltage, current, and power must fit the inverter’s operating range. The installer should check temperature changes, shading, roof direction, and future battery plans. Request calculations instead of general assurances. Also verify electrical safety, fire resistance, and mechanical-strength certifications. Small voltage details matter.

Conclusion

Choosing the best Solar Panel begins with understanding your household’s annual electricity consumption in kWh and peak demand. Assess available roof space, orientation, tilt, shading, and how the system performs under standard test conditions of 1,000 W/m². Compare monocrystalline, polycrystalline, and thin-film technologies by their typical efficiency ranges, physical size, and suitability for your roof.

To estimate realistic energy production, consider local peak sun hours, seasonal conditions, and each panel’s temperature coefficient rather than relying only on laboratory ratings. Review expected degradation rates, 25-year performance warranties, and long-term reliability. Finally, compare total system costs, inverter compatibility, installation requirements, safety standards, maintenance needs, and available incentives. A well-informed decision balances efficiency, output, durability, and overall value, helping ensure that the chosen system meets both current energy needs and future electricity goals.

Liam

Liam

Liam is a dedicated marketing professional at Zhongshan Sanhui Lighting Technology Co., Ltd., where he leverages his expertise to enhance the company's online presence. With a profound understanding of the lighting industry, Liam regularly updates the company's professional blog, sharing insights......
Previous Why Choose LED Street Lights for Global Buyers?